
We’ll cover how to:
- Create and manage Compensation Projections
Applicable Roles:
- Any role given access to this functionality
Before you get started:
- Person Title and Salary information is not retrievable from the Personnel feature within Fund Manager. All of the data in Projections must be entered manually.
The Compensation Projection is a workspace area to prepare and analyze future personnel expenditures on existing personnel or anticipated new hires. This feature calculates salary, fringe benefits, and indirect cost based on funding distributions entered manually. These calculations are then carried back to the Scenario Fund Summary.
Steps to Create and Manage a Compensation Projection
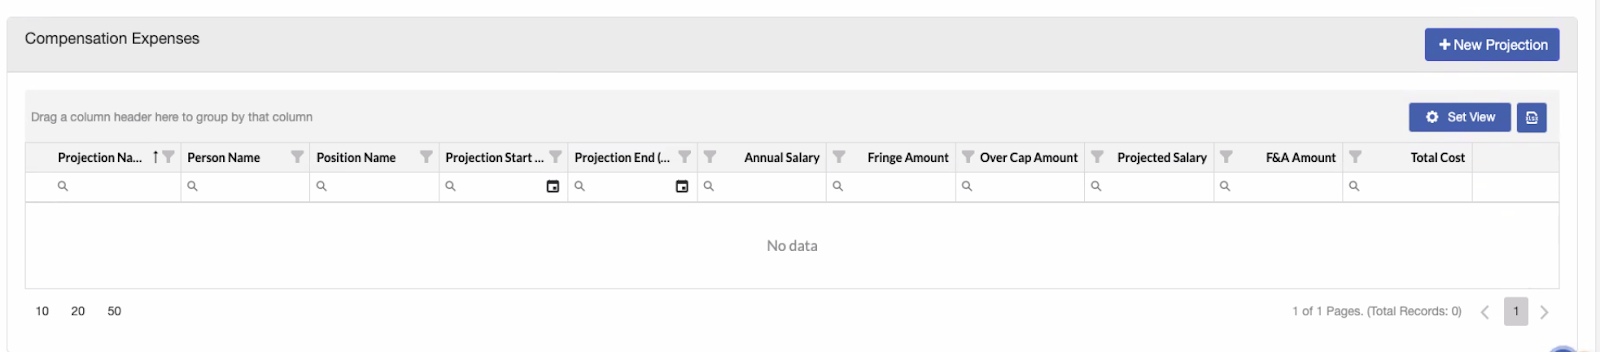
1. Scroll down to the Compensation Expenses box. Click on +New Projection.
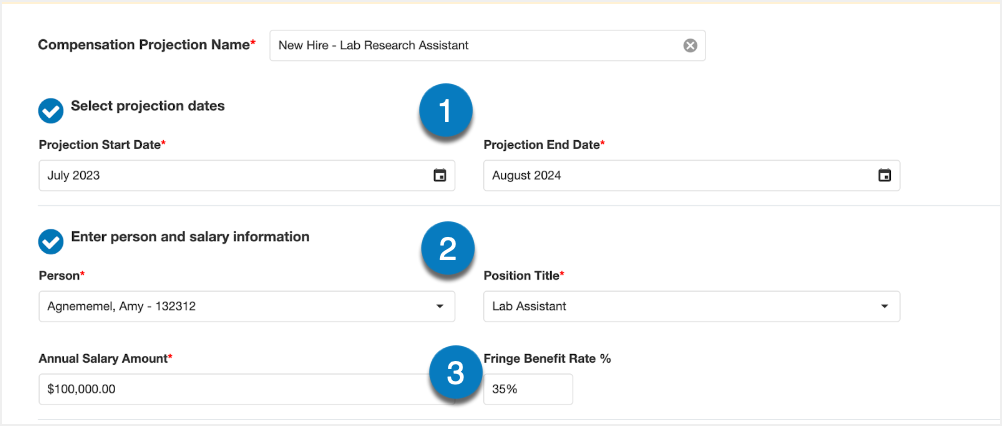
2. Complete the New Compensation Projection fields. Click Next once completed.
-
- Start and End Dates: Select the start and end date you wish to calculate the projected expense for.
- Person and Position Title: You must begin typing in the Person and Position Title search fields in order to view results in the drop-down. Alternatively, you may populate those fields with the free text of your choice.
- Salary and Fringe Benefit Rate: Enter the known or anticipated Annual Salary and Fringe Benefit Rate
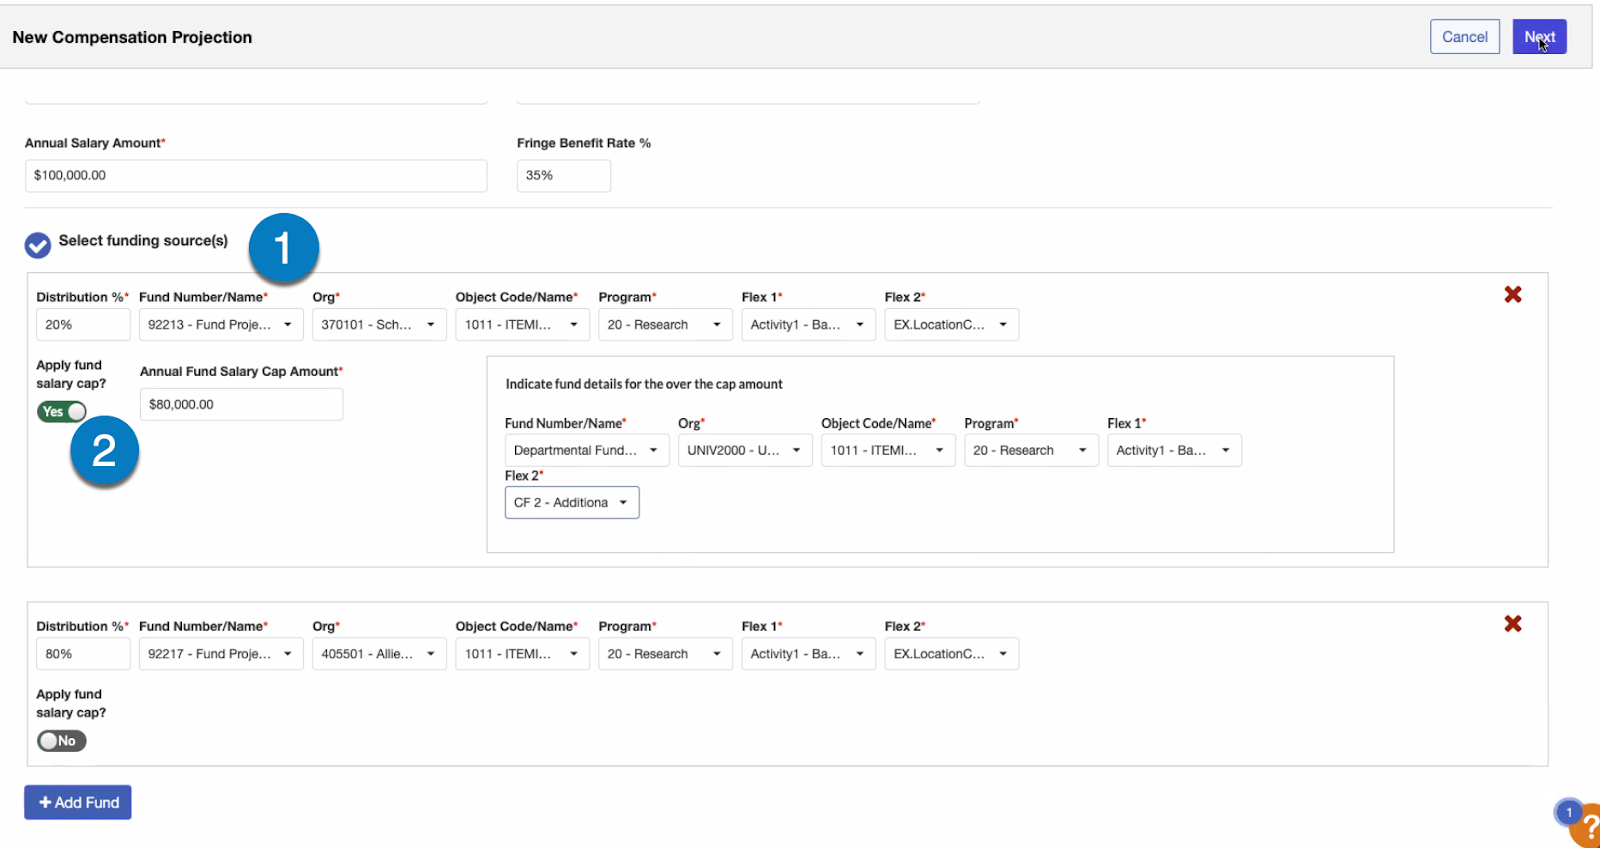
3. Fill out the New Compensation Projection information in the top area.
-
- Distribution % Field: When adding the initial Distribution %, you must enter 100%. Complete the rest of the chart fields. At this time, the +Add Fund button will become available. Click on it to add another fund or funds and then you can change the initial distribution % to suit your needs. All funds must equal 100% distribution before Saving.
- Salary Cap Toggle: If you have a Salary Cap, toggle to Yes.
4. Fill out the New Compensation Projection information in the bottom area.
Enter and Select data in each chartstring field. In all of the chartstring fields, you will only see the results in the dropdown based on your chartstring security.

- You will only see a maximum of 50 of each in the drop down list. We recommend for you to start typing either the code or the name if you have a lot of data retrievable based on your filter and security access.
- You must Select a Fund Number prior to having the ability to select an Org.
- You must select the Fund Number, Org and Object Code/Name prior to having the ability to select Program then Flex 1 and then Flex 2.
- If your organization doesn’t populate either Program, Flex 1, or Flex 2 with data, you need to ensure that at least one is created in the Master Code Table for each (such as None) so that there is the ability to select a code as these fields are all required fields due to enhanced chartstring security purposes.
- The display order of these fields are currently shown in a random order in the dropdown. With an upcoming release, they will be displayed in alphabetical order by their Code, with the exception of Org. The Org dropdown will display in your Org hierarchy build in your system.
5. Calculated Projection summary will be displayed. If edits are needed, click Edit to make adjustments then Next when finished. Click Save once you are ready to add the results to the scenario.

Results Overview
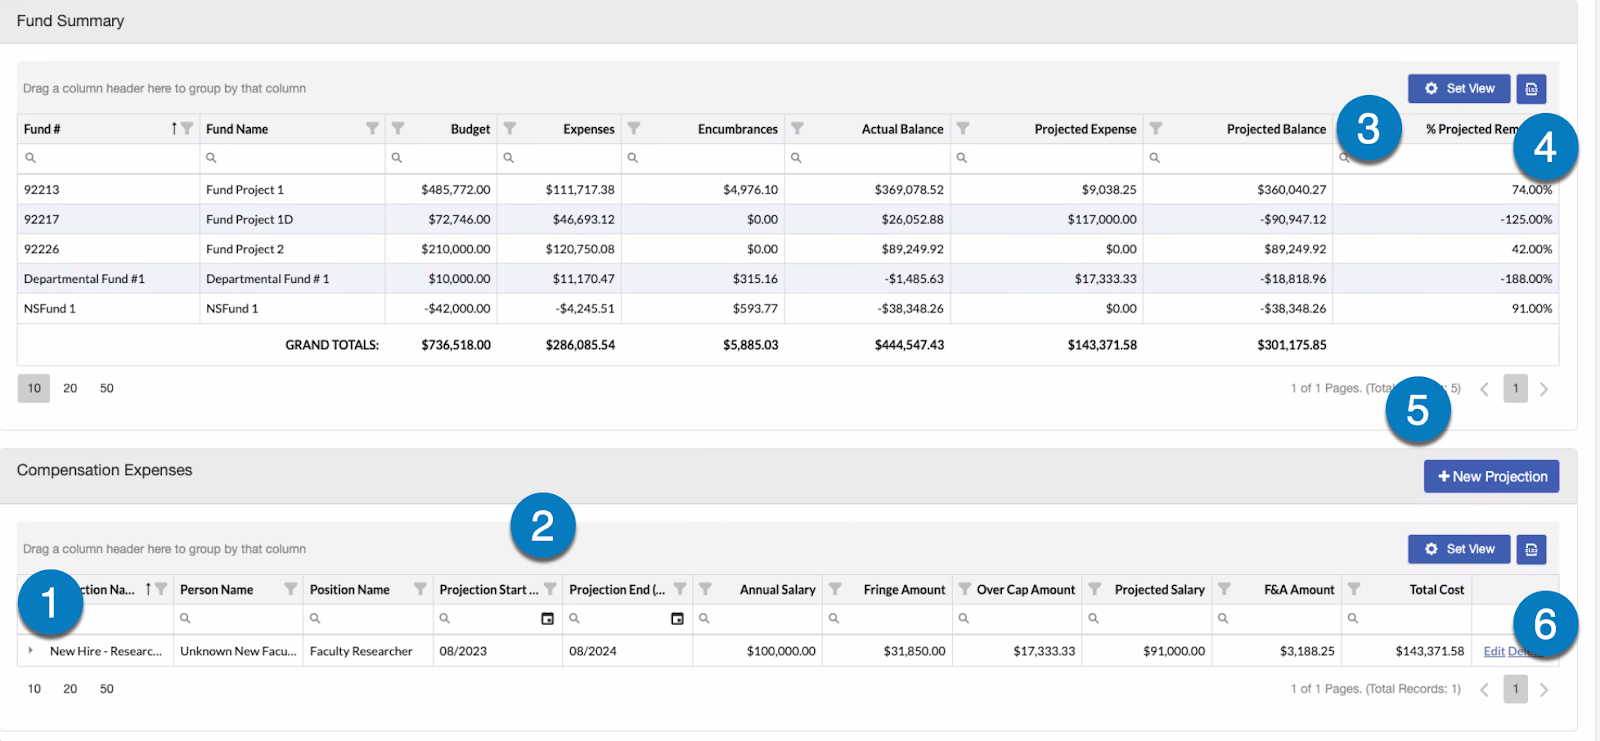
The calculated results populate in the Compensation Expense grid and those calculations are now displayed in the appropriate Funds in the Projected Expense Column in the Fund Summary. The following actions can be taken, including:
-
- Carrot: Click carrot to view more detailed info
- Manage Columns: If you have more than one Projection, you can sort and filter, drag and drop columns within the grid
- Set View: Click Set View icon located in either section to manage settings
- Download: Click download icon located in either section to download
- Multiple/New Projection: Click +New Projection to create additional projections within the same scenario
Edit and Delete: Click Edit or Delete within the Compensation Expenses grid to make changes or delete the Projection