
Department Manager uses a multi-level security system to control software and database access.
Typically, one or two users will be defined as administrators for each module, giving them all rights within the software. Non-administrators' security privileges are set up for each individual.
Follow these instructions to set up user profiles in the Department Manager Grant module.
- Click the Administration icon on the Department Manager system menu that appears in the system tray. A sub-menu appears.
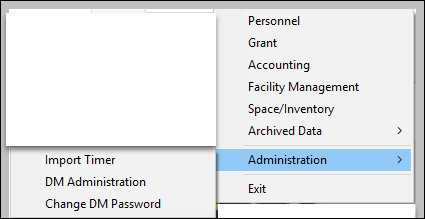
- Click DM Administration to launch the Administration Module.
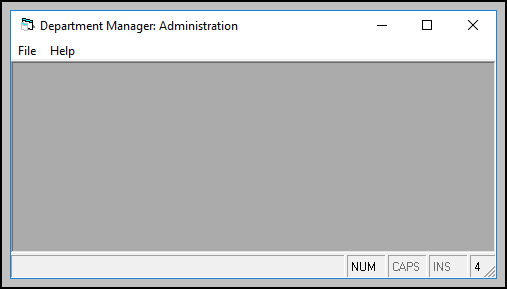
- Click File-User Setup to open the User Setup screen.
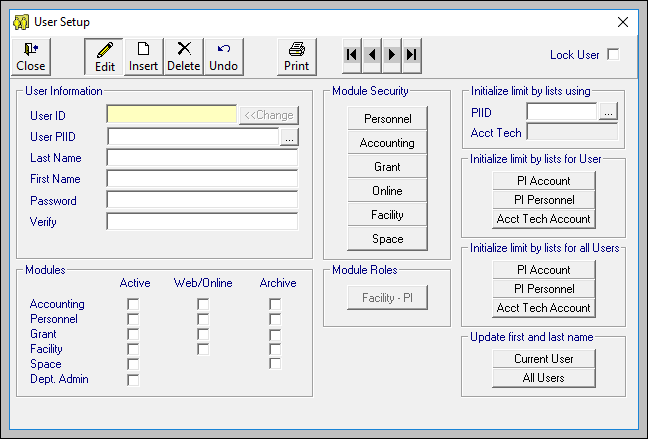
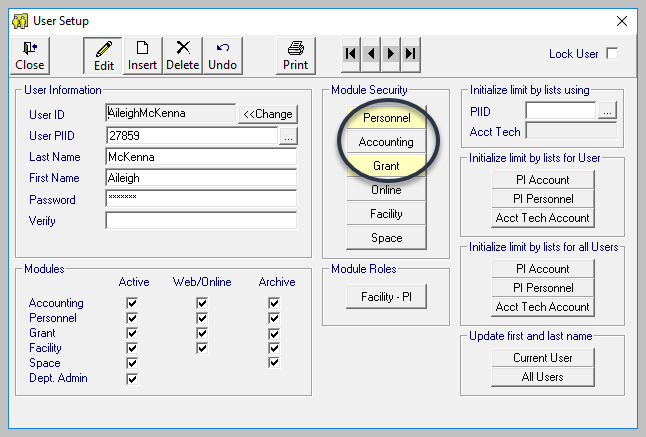
- Click the Insert button on the toolbar. (You will use the Edit button when you simply need to make changes to a user profile.)
- Enter appropriate profile data and password under User Information. We recommend defining the User ID to match the user's Windows login ID. (Enter a PI ID if the user is a Principal Investigator)
- Click check boxes in the Modules section that correspond to the modules that the user will access.
- Select Initialize Limit By List... options. Hover your cursor over the various buttons for explanations of the limits.
- Under Module Security, click Grant to confer user privileges for this module. For new users, a dialog box appears, such as the Grant module example shown here.
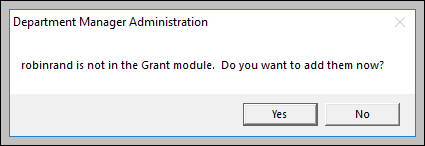
- Click Yes at the prompt. A Security Setup screen appears for the module you have selected. Grant Security Setup is shown here.
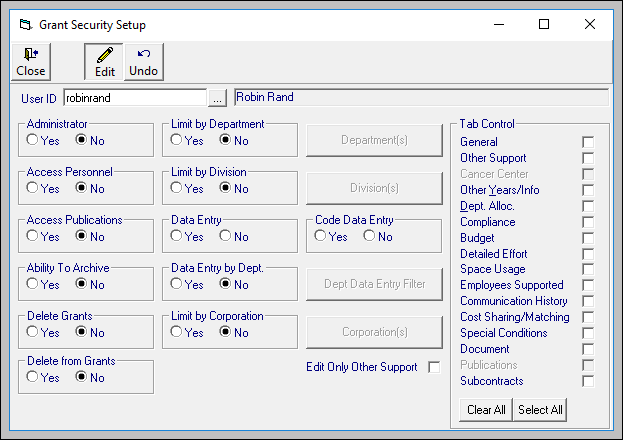
- Set appropriate user privileges for administrative functions and access on this screen. Note that Clear All and Select All buttons are available to speed your selections. (Additional details follow about Limit By... options and about Security Setup fields and buttons.)
Click Close when you complete the settings. - Click any additional modules in Module Security for which you want to add this user. Modules that you have already set up will be highlighted. In this example, Accounting is not yet set up.
Repeat Steps 8 through 10 for each module you select. - Click Close to exit the User Setup screen.
Understanding Limit By Options on the Security Setup Screen
While working with the Grant Security Setup screen, you will have the option to set Limits by Department, Division, Code Data Entry, and so on. If you select Yes, a corresponding button activates to the right of the radio buttons. In these figures, you can see the differences when Department(s), Divisions, and Data Entry are activated and inactivated.


IF you wish to limit a user's ability to view or enter data by Department, Division, or Data Entry by Department, select Yes and click the corresponding button to the right. A Limit By... screen appears (Limit by Department is shown here).

Select the desired option from the drop-down menu on this screen.
Click Close to return to the Security Setup screen and repeat for each Limit By option that you wish to set.
Understanding Security Setup Fields and Buttons
As you fill out the Security Setup screen, you may find this reference helpful.
|
Grant Module Security Radio Buttons |
Options |
Grant Module Security Questions/Descriptions |
|
Administrator |
Yes/No |
Do you want the user to have full rights to the Grant Module? They would be able to access everything in the module including the security system. This right should be dispensed judiciously. |
|
Access Personnel |
Yes/No |
|
|
Access Publications |
Yes/No |
|
|
Ability to Archive |
Yes/No |
Do you want the user to be able to archive data? |
|
Delete Grants |
Yes/No |
Do you want the user to have the ability to delete grant information? |
|
Delete From Grants |
Yes/No |
Do you want the user to have the ability to delete information from within the grant? |
|
Limit By Department |
Yes/No |
Do you want to limit the user’s access to grants/proposals within a particular department or within several departments? |
|
Limit By Division |
Yes/No |
Do you want to limit the user’s access to grants/proposals within a particular division or within several divisions? |
|
Data Entry |
Yes/No |
Do you want the user to be able to enter data or change existing data? |
|
Data Entry by Department |
Yes/No |
Do you want the user to be able to enter data or change existing data for particular departments only? |
|
Limit by Corporation |
Yes/NO |
Do you want to limit the user’s access to grants/proposals within a particular corporation? |
|
Code Data Entry |
Yes/No |
Do you want the user to be able to enter codes or change codes within the Grants Module? |
|
Edit Only Other Support |
Check box |
Do you want the user to be able to enter or change the Other Support Page only? (If you answered “No” to Data Entry questions). |
|
Tab Control |
Check box |
Do you want the user to see the tab? (Select all if you are unsure; you can return and revise them later.) Administrators see all tabs. |
What's Next?
Proceed to Understanding Organizational Codes if you are ready to set up codes specific to your organizational structure. You may find it helpful to enlist the aid of central accounting staff to define the structure of various codes and possibly provide spreadsheets with relevant data.